With Australia’s varied climate there are a wide variety of reasons you might choose to install additional ventilation as a safety measure in your shipping container.
It might be that you want to increase natural airflow to keep items safe from condensation during long term storage.
This blog will help you whether you have already purchased a 10, 20, or 40 ft container from Gateway Container Sales & Hire, and need to increase the natural air movement within the unit. It can also help you work out more details around when and why airflow might be important in your container.
Why ventilation is important
Poor ventilation procedures in cargo containers can increase the level of exposure to environments that might cause health issues. Without proper ventilation, goods inside your airtight container will, over time, begin to moisten.
Moisture is a common problem for many long term storage environments, and it can cause all kinds of problems for your belongings.
- Depending on item-specifics (such as some foodstuffs, fresh produce, or flowers), moisture could cause an item to lose its quality
- A lack of airflow can cause the environment to become too humid and be uncomfortable for occupants
- If condensation had a chance to occur it could cause mould and bacteria. This can destroy items and it can also create health risks from chronic exposure.
The solution is to create airflow by adding ventilation to your container. Ventilation allows the natural air movement of convection and forced air circulation.
This flow of air allows excess moisture-laden air to escape, keeping each item in your container in great condition.
Where should vents be installed?
It’s important to keep in mind not only the location of vents in your shipping container but also what direction air is allowed to flow.
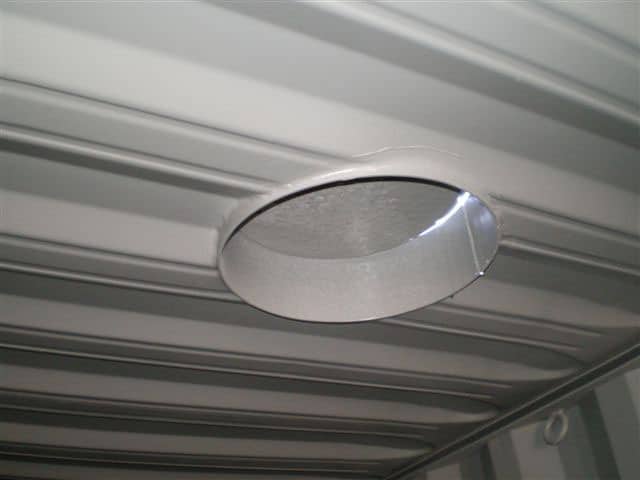
For natural ventilation, we recommend installing a whirlybird collar, and whirlybird on the roof of a shipping container. Then, vents should be installed along the walls of the container to assist the whirlybird in air circulation. This will allow for hot air to rise out of the container and cooler air from outside to move inside.
Once a steady flow has been established, this will create airflow by using convection. For consistency, it is best if as many vents are aligned as possible when placing them around a shipping container home or office.
How many vents do you need to install?
The standard vent size for a 20-foot container is a 4″x 4″ vent, and a 40-foot container would have vents 6″x 6″. You could also use several smaller vents if needed.
What ventilation do you need to install?
There are plenty of ways to improve shipping container ventilation and these will differ depending on the intended use. Some are easy to do yourself while others will need to be done by an expert, such as those who work in the container modifications workshop at Gateway Container Sales & Hire. These customer-specific ventilation solutions are tailored to your individual shipping container ventilation needs and can include:
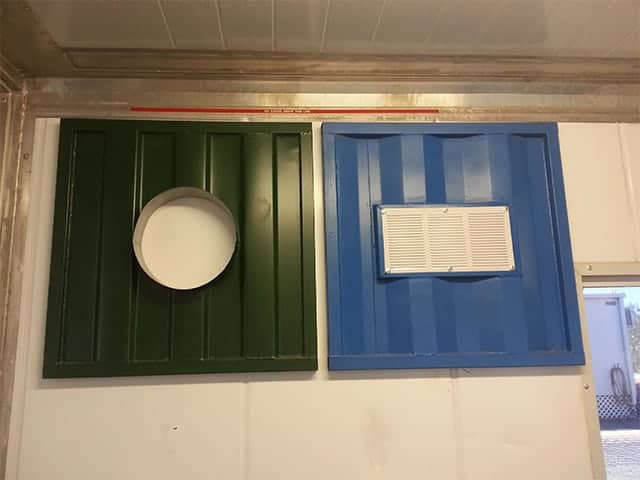
- Small Vents for Natural Ventilation
- Large Steel Louvered Vents
- Turbine/Whirly Birds Vents

Other Options:
Fixed or portable air conditioning or heat pumps
If you are looking for something more than just air ventilation – such as cooling in a hot climate or heating in a cool climate – then either a fixed or portable air conditioner is the way to go.
This will require some form of electrical supply and a professional to install. Our team has extensive experience in installing air conditioning, in both new and second-hand shipping containers for all climates.
Portable dehumidifiers
Another simple solution (especially if it is only temporary) might be to use a portable dehumidifier..
A dehumidifier will require some form of external power supply or electrical wiring in the container, as well as piping, to dump any extracted water to prevent it from circulating back into the container.
Do you need shipping container ventilation installed?

Feel more comfortable in your space by cooling the inside temperature of your shipping container through the installation of ventilation.
Whether it’s a few vents, whirlybird turbines installed on the roof, or a full-on air conditioning setup, the Gateway team are the ones to call for ventilation solutions.
We have a wide range of container types and even offer container vent installation by our qualified team. Our shipping container modifications are second to none and our stock is in excellent condition.
Make your new space more comfortable with adequate ventilation. Get in touch and we will give you the best ventilation products for your specific needs – ensuring that your containers stay cool (or hot if you need it that way), dry and ventilated.